Author

admin

Browsing

Turn signals are a basic but critical safety feature that must be in perfect working order for every vehicle on the road. Whether during routine maintenance or in response to a reported issue, service centers follow specific procedures to ensure turn signals operate correctly. These tests help diagnose problems early and confirm the system is safe and compliant. This article explains the typical testing methods professional shops use to check turn signal function and what vehicle owners can expect during a service visit.

Visual and Functional Checks

The first step in testing turn signals is a simple visual and functional inspection. Technicians activate the turn signals one side at a time and walk around the vehicle to ensure all bulbs flash at the correct rate, brightness, and duration. This check includes the front and rear turn indicators, side mirrors (if equipped), and dashboard indicator lights. Look for the Auto Repair in Columbus, NE based service in this case.


If a signal doesn’t light up or flashes unusually fast (hyper-flashing), that can indicate a burned-out bulb or a change in electrical resistance—especially common in vehicles that have had recent LED conversions without the proper resistors.

Switch and Stalk Operation

Next, technicians evaluate the turn signal switch or stalk on the steering column. They check for a firm, positive feel when engaging the signal and verify that it cancels automatically after a turn. If the switch feels loose or fails to stay in position, it may point to a worn-out multi-function switch that requires replacement.

Service centers will also test hazard lights, which use the same bulbs and circuitry. A problem in the hazard system can help pinpoint a shared wiring or flasher issue affecting the turn signals.

Electrical System Testing

If a turn signal issue is suspected to be electrical, technicians use multimeters or scan tools to check for proper voltage and continuity in the wiring. They may perform resistance tests to identify corroded or broken wires. Technicians also examine grounds and connectors, which are common failure points.

In modern vehicles, scan tools can communicate with the body control module or lighting control unit to retrieve fault codes and check signal input/output data. This helps diagnose ECU-related problems or sensor errors affecting the turn signals.

Bulb, Socket, and Relay Inspection

Shops often remove bulbs to inspect them for damage or discoloration. Sockets are checked for corrosion, looseness, or overheating—common issues that can lead to flickering or non-functioning signals. The turn signal relay or flasher module is also tested, especially if signals don’t flash at all or click erratically.

If needed, replacements are made with OEM-quality parts to ensure compatibility and long-term reliability.

Conclusion

By following a thorough, step-by-step testing process, service centers ensure turn signals are functioning safely and efficiently. These procedures help identify and resolve issues before they become safety hazards. Regular inspections during routine service keep your vehicle roadworthy and your signals dependable every time you drive.

We all work for money and it is a precious resource to meet our needs, wants, goals and dreams. Saving money and using it judiciously is as equally important as earning it by working hard. The prices are high and rising up slowly. So it is important to cut down unnecessary expenses and explore ways to get things done with minimum resources. For example, if you travel to your favourite holiday destination, you can turn your trunk into a nice hotel. Then you can enjoy overnight car camping rather than spending huge part of your savings at star hotels and facing financial burden. You can Learn more here at https://trunk-mate.com/.

In this article, let us explore different appliances related to car camping.

As we discussed, turning your car into a hotel is an economically more viable and cheap option. What attracts us more in a hotel? A safe place with four walls, comfy mattresses, lighting which elevates mood, right! If you can buy one sleeping platform that fits your truck, you can enjoy all these facilities in your car itself. 

You need a foldable platform which can level up the car floor and provide a soft base to get relaxed.  You can learn more here at https://trunk-mate.com/ and place an order for a perfect trunk bed platform. You can arrange the lighting as per your preference and mood. That’s it! Exciting car cum hotel is ready. 

For car camping, the other things you need are car camping stoves. You can prepare your own hygienic lip smacking meals at your own convenient time. Also, you do not need to worry about the hotel closing hours as preparation of meals and having them can be done at your convenience.

Further, you also need car camping tents. Without them, this experience is not so attractive. So make sure you add this item to your things to pack list. You do need to worry about the weather conditions with this. Be it rainy or windy or sunny, things ate under your control. You are outdoors and still be safe with those arrangements. 

As per your needs, you can also take with you car camping air conditioners. Now, all these things are available at portable size and lightweight. You can happily save space in the car and can have a positive experience with car camping.

With the above few appliances, you can see a big chunk of the hotel stay budget. Further, you can use these appliances for many years. Recurring use of the appliances makes worthy of buying.

Car taillights are critical for safe driving, especially at night or during poor weather conditions. When a taillight suddenly stops working, it can be frustrating and dangerous. One common but often overlooked cause of taillight failure is a faulty fuse. Understanding the role of fuses in your vehicle’s lighting system and how fuse problems occur can help you quickly identify and fix taillight issues, keeping you safe and compliant with traffic laws.

The Role of Fuses in Car Taillight Functionality

Fuses act as safety devices that protect your car’s electrical circuits from damage caused by power surges or short circuits. Each fuse is designed to break the electrical connection when current exceeds a certain level, preventing overheating and potential fires. In the taillight circuit, fuses ensure that excess current from wiring faults or component failures doesn’t damage the bulbs or wiring harness. If the fuse blows, it interrupts power flow to the taillight, causing it to stop working completely.

Common Signs of a Blown Taillight Fuse

A blown fuse is often the simplest explanation for one or more taillights suddenly failing. Common signs include taillights that do not illuminate at all, flickering lights, or certain functions like brake lights or turn signals not working properly. Unlike burned-out bulbs, which usually affect only one light, a blown fuse can disable multiple lights simultaneously because it cuts power to the entire circuit. If you experience sudden, unexplained taillight failure, checking the fuse should be one of your first troubleshooting steps. A smart choice comes there when you choose the Auto Repair in Oklahoma City, OK based service.

Causes of Fuse Failures in Taillight Circuits

Fuses typically blow due to electrical faults such as short circuits, wiring damage, or component failures. Moisture intrusion in the taillight assembly or corroded wiring can cause a short that triggers the fuse to blow. Faulty or worn-out bulbs that draw excessive current can also stress the fuse. Occasionally, installing the wrong fuse size or a low-quality replacement can lead to repeated failures. Identifying the root cause of the blown fuse is critical to prevent ongoing issues and avoid potential electrical damage.

How to Check and Replace a Taillight Fuse

Checking a fuse is a straightforward process that most vehicle owners can perform with minimal tools. Locate the fuse box (usually under the dashboard or hood), identify the taillight fuse using the diagram, and inspect it for a broken filament or discoloration. If the fuse is blown, replace it with one of the exact same amperage rating. Avoid using a fuse with a higher rating as it can allow unsafe current levels, risking further damage. After replacement, test the taillights; if the fuse blows again, professional electrical diagnosis is recommended.

Preventing Future Fuse Problems

Regular maintenance of your car’s electrical system helps reduce the risk of fuse issues. Inspect taillight wiring for damage, keep connectors clean and dry, and promptly replace faulty bulbs. If your vehicle frequently blows fuses, have a technician perform a detailed inspection to identify shorts or other electrical problems. Using quality replacement parts and avoiding overloading circuits will also keep your taillight fuse working smoothly.

The evaporator coil is crucial to the efficient operation of your car’s air conditioning system. The AC evaporator, which is situated inside the cabin and typically behind the dashboard, is in charge of removing heat from the air to keep your ride comfortable and cold. However, this important part may clog or begin to leak over time. When this occurs, the entire AC system’s effectiveness may be jeopardized, resulting in discomfort or expensive repairs. You may prevent the issue from getting worse by being aware of the warning indications of a blocked or leaky AC evaporator. For professional diagnostics and solutions, it’s wise to seek Auto AC Repair in Shelton, WA, where trained technicians can properly inspect and restore your system’s performance.

Reduced Cooling Efficiency

A discernible decrease in cooling efficiency is one of the initial indicators of a blocked or leaky evaporator. The evaporator may be having trouble absorbing enough heat if your air conditioner is blowing warm air or if cooling the cabin takes a lot longer. Debris, mildew, or dust clogs can restrict airflow and hinder the coil’s ability to function properly.

Unusual Odors from the Vents

AC vents that smell musty or moldy are another sign of an evaporator problem. Mold and mildew can grow on the evaporator coil if it doesn’t drain properly. These growths can clog the coil and emit foul odors into the automobile. If the odor persists after changing the cabin air filter, clean the evaporator.

Visible Refrigerant Leaks or Stains

A refrigerant leak may be visible under the dashboard or under your car. Evaporator leaks can stain the passenger side footwall, and refrigerant often leaves an oily residue. Because the evaporator is inside the cabin, moisture or unexplainable wetness may suggest a leak. Unchecked, this might produce corrosion or electrical issues.

Hissing or Bubbling Sounds

A refrigerant leak may generate hissing or bubbling air conditioner sounds when turned on. These noises are often caused by refrigerant seeping from a tiny evaporator crack or hole under pressure. While some AC system noise is normal, persistent unusual sounds should be addressed immediately. Evaporator leaks can drop system pressure and damage compressors if uncontrolled.

Frequent Cycling or AC System Shutdown

A faulty evaporator may cause frequent AC shutdowns or on/off cycles. If a leak or constraint causes abnormal pressure levels, the system may cycle more to stabilize. In extreme cases, the system may shut down to prevent damage. Wasteful and inconsistent, this behaviour may signal significant evaporator or related part issues.

Conclusion

Early detection of the signs of a leaky or clogged AC evaporator can prevent costly repairs and uncomfortable drives. It’s important to have a trained professional check your car’s air conditioning system right away if you see any of these symptoms.


Transportation of large and over-dimensional loads is a rare sight to begin with. Just envision some gigantic turbine blade of a wind turbine or some oversized chunk of mine machinery making its trip across busy city streets, rural roads, or via challenging routes. If this was not so painfully prepared for, the whole thing would quickly be a mess on wheels. Behind these heavy haul operations, some unsung heroes keep transportation safe, efficient, and hassle-free: route surveys.

Heavy Haulage: A World of Challenges

Heavy haulage is a technique of moving overweight and oversized cargoes that go way beyond standard dimensions and weight limits. Such would include industrial equipment, prefabricated structures, or infrastructures. In their movement, such cargoes develop quite a number of complications, including, among others, strict road and transport regulations, pure handling in terms of the size and weight of the cargo, and planning a route which can suit such a load.

One slight error might lead to costly delays, litigation, or disastrous accidents. Proper planning with route surveys is the most vital ingredient in this context.

What Is a Route Survey?

A route survey closely studies the proposed heavy haulage transport route. It will identify potential problems, check the road’s conditions, and verify whether all formal requirements have been met.

Key Components of a Route Survey

  • Identifying Suitable Highways and Roads: Not every highway is designed to bear an oversized load. Surveys identify the safest and most efficient routes possible.
  • Infrastructure Assessment: Most importantly, bridges, tunnels, and overpasses will have to be assessed to confirm that they can support dimensions and weight.
  • Check for Obstacles: Flag overhanging power lines, trees with low overhangs, and sharp turns to avoid disruptions.
  • Compliance and regulatory mechanism: Compliance is adhered to; necessary reviews and permissions at the local levels are fetched and availed with minimum fines and avoidance of delay in operations.

Why Route Surveys Are Important in Heavy Haulage

  1. When things go sideways, big cargo can be really risky. Doing a route survey helps cut down on these dangers by highlighting potential hazards and making sure the path is safe for the load, crew, and everyone else involved.

2. Any deviation or unforeseen obstruction can lead to delay. Surveys lead to smooth operations, help get things done on time, and prevent problems. 

  1. Route Surveys save money by cutting down on unexpected repair costs, fines, or delays. 

How To Survey A Route?

Route surveying involves a few steps as outlined below:

Step 1: Preliminary Studies

Maps, satellite images, and other digital tools are used to form a preliminary judgement about the routes that can be undertaken and the challenges. 

Step 2 : On-ground clearance

Surveyors hit the ground when checking out the route to see what’s what. They get clearances, assess the road conditions, and foresee potential hazards.

Step 3 : Liasoning with local authorities

After that, they contact local councils, transport departments, and utility companies to obtain permits and make necessary quick adjustments.

Step 4: Documentation and Planning

These are supported by detailed reports and contingency planning for any unexpected situations.

Technological Tools Behind Modern Route Surveys

Advanced technologies integrated into route surveys brought a change in the following ways: 

  • Full Accuracy Mapping of GPS and GIS Mapping: Pinpointing optimal routes.
  • Drones: The real-time and aerial imagery of routes gives a glimpse of critical areas not possible at ground levels.
  • Simulation Software: Precheck viability through a simulated test that ascertains all possible setbacks or upsets an operator may face.
  • AI and Predictive Analysis: AI analyses the disposition of historical data to predict traffic patterns and other environmental conditions.

The Dangers of Poor Route Surveys

Not performing a proper route survey may result in some terrible outcomes:

  • Accidents and Damages: Poor planning can lead to collision and structural damage to roads or cargo.
  • Financial Losses: Delays, repairs, and penalties inflate operational costs.
  • Legal Implications: Non-compliance with regulations may result in very heavy fines or litigation.

One such incident involved a company that had not done a route survey and got its transport vehicle stuck under a low overpass. The cost for delays, damages, and litigation was in the millions.

Best Practices for Effective Route Surveys

To have a successful route survey, the following are key factors to consider:

  • Use experienced personnel who are conversant with the local regulations.
  • Utilise advanced equipment that will expedite the operations with increased precision.
  • Have open and clear communications amongst all concerned.
  • Routing is to be updated to capture the infrastructure changes and road conditions.

Route surveys are super important for a smooth heavy haulage operation. They help keep things safe and efficient while making sure you follow all the rules and minimise risks and costs. If you’re dealing with the challenges of transporting oversized loads, investing in thorough route surveys is not just a good idea—it’s a must.

If you’re gearing up for a heavy haul, make sure to focus on getting a complete route survey done. Teaming up with experienced professionals will help you tackle the tricky aspects of transport logistics with ease. 

For decades, car customization has been the canvas for personal expression—ranging from slick performance mods to wild paint jobs. But in recent years, a new trend has emerged that merges pop culture and street aesthetics in a way that resonates deeply with a passionate subculture: anime car art.

Among the leading franchises shaping this movement is Demon Slayer: Kimetsu no Yaiba. With its captivating visuals, emotional storytelling, and iconic characters, it’s no surprise that Demon Slayer car stickers are taking center stage in the anime wrap and sticker scene. These vibrant decals are not just accessories—they’re a declaration of identity, fandom, and street-savvy creativity.

In this guest post, we’ll dive deep into why Demon Slayer car stickers are exploding in popularity, explore design inspirations and applications, and offer practical tips for anyone looking to ride in true anime style.

Why Demon Slayer? The Fandom Fuel Behind the Trend

To understand the surge in Demon Slayer car stickers, we need to acknowledge the cultural impact of the anime itself.

Since its debut in 2019, Demon Slayer has taken the anime world by storm. It has broken box office records, won countless awards, and built a loyal fanbase across the globe. Its striking visual style, crafted by studio Ufotable, makes it uniquely suitable for adaptation into high-resolution car decals.

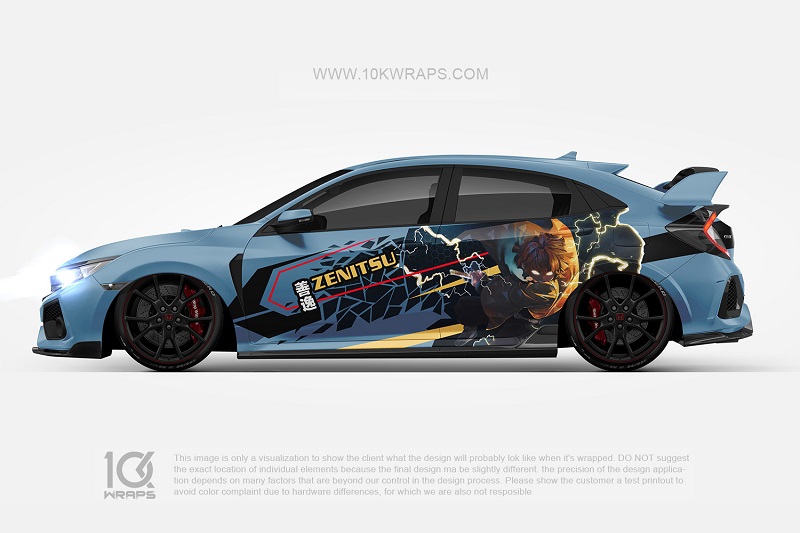
Characters like Tanjiro Kamado, Nezuko, Zenitsu, and Inosuke have become instantly recognizable icons, while the various Hashira captivate fans with their distinct aesthetics—each ripe for artistic reinterpretation. The blend of traditional Japanese motifs and modern action storytelling gives artists plenty to work with when crafting car sticker designs.

Unlike temporary cosplay or digital fan art, Demon Slayer car stickers are a bold, mobile expression of passion. They’re not confined to conventions—they cruise through city streets and highways, turning heads wherever they go.

The Evolution from Itasha to Everyday Customization

Itasha—literally “painful car” in Japanese—originated in the 1980s and refers to vehicles decorated with anime characters, typically covering large surface areas of the vehicle. While full anime wraps are still very popular among hardcore fans, many drivers prefer a more subtle approach.

That’s where Demon Slayer car stickers come in.

Instead of covering an entire car, these stickers offer modular, budget-friendly, and customizable ways to showcase fandom. Whether it’s a small Nezuko chibi on the rear window, a sleek Rengoku flame graphic on the side panel, or a stylized “Water Breathing” kanji set across the hood, these stickers bring the itasha spirit into daily driving—without overwhelming the aesthetic or breaking the bank.

Plus, they’re more accessible for younger drivers, those leasing vehicles, or fans who want a tasteful touch without the full commitment of a vinyl wrap.

Popular Demon Slayer Car Sticker Themes and Styles

1. Character-Centric Stickers

These are by far the most common. Full-body or bust images of Tanjiro, Nezuko, and the Hashira are often used in vibrant color or monochrome styles. Chibi (super-deformed) versions add a cute twist, while more serious renditions emphasize strength and drama.

2. Hashira Motif Designs

Each Hashira in Demon Slayer has a unique aesthetic that translates beautifully into minimalist decals or background patterns:

  • Giyu Tomioka’s water patterns offer flowing, blue wave visuals.
  • Rengoku Kyojuro’s flames bring intense energy to side graphics.
  • Shinobu Kocho’s butterflies and pastels are perfect for a softer, artistic look.

3. Breathing Techniques

“Water Breathing,” “Thunder Breathing,” and other stylized technique names are often turned into Japanese kanji stickers, either with brushstroke-style typography or flame/water enhancements. These look amazing on hoods, windshields, or along doors.

4. Logo and Emblem Designs

Fans often opt for the Demon Slayer Corps logo, the Taisho-era fonts from the anime’s intros, or even symbolic items like Tanjiro’s earrings or Nezuko’s bamboo muzzle.

5. Scene Panels and Manga Cuts

Black-and-white manga panels turned into rear windshield stickers are increasingly popular. Iconic lines or emotional scenes add drama and intensity without needing vibrant color.

Best Placement Ideas for Demon Slayer Car Stickers

Placement makes a huge difference in the visual impact of your sticker. Here are some of the best areas to consider:

  • Rear Windshield: Great for larger designs or manga panels. Visibility from behind ensures maximum exposure.
  • Side Doors / Fenders: Perfect for motion-themed art like breathing techniques or elemental effects.
  • Hood and Roof: Great for bold central emblems or stylized character busts.
  • Quarter Panels / Trunk: Ideal for minimalist logos, quotes, or chibi characters.
  • Side Windows: Use clear vinyl or outline-style stickers to keep visibility intact while adding flair.

Tips for Applying and Caring for Your Stickers

Whether you’re buying pre-made Demon Slayer car stickers or designing custom ones, proper application and maintenance are essential:

  1. Clean the Surface: Use isopropyl alcohol to remove dirt, wax, or oils before applying the sticker.
  2. Use a Squeegee or Credit Card: Press out air bubbles carefully as you apply the sticker.
  3. Don’t Rush: Align everything perfectly before applying pressure. You usually only get one shot.
  4. Avoid High-Pressure Washing: While most stickers are weatherproof, direct high-pressure water can cause peeling over time.
  5. UV Protection: Opt for stickers with UV-resistant laminate to prevent fading.

Custom Demon Slayer Car Stickers: A Growing Market

As demand grows, more shops are offering custom sticker services where fans can choose characters, poses, and text combinations. Some even offer color changes or hybrid crossover designs (e.g., combining Demon Slayer with other anime aesthetics or personal branding).

This is where businesses like 10kwraps.com and other anime wrap shops are seeing traction—not just for full itasha wraps, but for sticker kits and one-off vinyls. Artists and wrap designers are increasingly offering downloadable or pre-cut kits featuring Demon Slayer themes.

These stickers are often printed on durable automotive-grade vinyl, laminated for protection, and available in matte, gloss, or even chrome finishes.

The Psychological Power of Anime Stickers

It’s easy to view Demon Slayer car stickers as just fandom fun, but there’s a deeper layer at play here: identity expression.

In a world where most vehicles look the same off the lot, these stickers let drivers say something about who they are—without needing to speak a word. Anime, especially shows like Demon Slayer, often resonates on a deeply personal level. They represent strength, redemption, loyalty, pain, and healing.

Displaying these themes proudly on your ride is more than aesthetic. It’s cultural shorthand among fans, a symbol of shared stories, and a mobile piece of artwork. Whether you’re parked at a con, fueling up, or just cruising through the city, these decals connect you to a community.

Where to Find Demon Slayer Car Stickers

There are several great places to find high-quality Demon Slayer car stickers:

  • Anime conventions: Support independent artists offering unique designs.
  • Online wrap and sticker shops: Platforms like 10kwraps.com provide both stock and customizable options.
  • Etsy: Great for handmade, artistic interpretations.
  • Redbubble / TeePublic: These have a wide range of fan-created artwork, but check for resolution quality and materials before buying.
  • Specialty wrap providers: Some niche companies offer pre-cut sticker kits for cars, motorcycles, laptops, and more.

Final Thoughts

The rise of Demon Slayer car stickers reflects something bigger than just anime trends. It’s about self-expression, art in motion, and a sense of belonging to something vibrant and emotional. Whether you’re rocking a subtle emblem or a full side panel tribute to your favorite Hashira, you’re participating in a growing global movement where cars become canvases—and anime, the language of the street.

As this culture evolves, we’ll likely see even more refined designs, collabs between artists and wrap shops, and sticker kits that blur the line between illustration and automotive design.

So next time you’re stuck in traffic and catch a glimpse of Nezuko clinging to a trunk lid or Rengoku’s flames roaring across a spoiler—give a nod. You’re not just seeing a sticker. You’re witnessing a story, rolling by.


Relays are the unsung heroes of your vehicle’s electrical system. These small, electromagnetic switches control various systems, from starting the engine to powering the headlights and AC. When a relay fails, it can lead to frustrating malfunctions and even leave you stranded. Regular relay maintenance is therefore crucial for ensuring your vehicle’s overall reliability and preventing unexpected breakdowns. Ignoring these small components can lead to bigger, more expensive problems down the line.

The Importance of Professional Relay Cleaning

Over time, relays can accumulate dust, dirt, and corrosion within their housings and on their contact points. This build-up can impede the flow of electricity, leading to intermittent performance, weak connections, and eventual failure. While some drivers might attempt to clean relay themselves, professional relay cleaning is highly recommended. Technicians use specialized tools and solvents designed to safely and effectively remove contaminants without damaging the delicate components. This meticulous cleaning process ensures optimal conductivity and extends the lifespan of your relays.

Regular Socket Inspections: Preventing Connection Issues

Even with clean relays, sockets can cause problems. Corrosion, loose terminals, and physical damage to relay sockets can damage a vehicle’s electrical system. Poor socket connections can cause intermittent performance, system malfunctions, and electrical damage, just like a malfunctioning relay. Skilled mechanics must inspect sockets regularly. These assessments can detect and fix issues before they worsen. The socket terminals should be cleaned to remove corrosive build-up that could block electrical passage during examination. Mechanics should also tighten weak connections to maintain electrical stability. Replacement of obviously damaged sockets is important to ensure electrical system integrity. Proactive relay socket maintenance prevents electrical faults and maintains vehicle performance.

Recognizing the Signs of a Failing Relay

Being proactive is key to preventing relay-related issues. Familiarize yourself with the common signs of a failing relay. These include: clicking sounds from the relay box, intermittent operation of the connected system (e.g., flickering headlights, inconsistent AC), a system failing to operate at all, and even unusual engine behaviour. If you notice any of these signs, it’s crucial to have a professional diagnose the problem. For reliable diagnostics and solutions, trust Auto Repair in Newport, RI to address relay-related issues effectively. Ignoring these warning signs could lead to more significant damage to other components connected to the relay.

Conclusion

While some basic troubleshooting can be done at home, relay maintenance is best left to the pros. They have the skills, tools, and experience to identify problems, clean and inspect relays and sockets, and optimize performance. Regular maintenance, like relay cleaning and socket inspections, can enhance your vehicle’s reliability, prevent costly repairs, and give you piece of mind on the road. Relay maintenance as part of your routine vehicle servicing helps prevent electrical issues and keep your automobile running smoothly.


The sinking feeling of discovering a scratch on your car’s hood is a shared experience for many vehicle owners. Whether it’s a key mark, a rogue shopping cart, or simply the wear and tear of daily life, scratches can detract from your car’s appearance and potentially reduce its resale value. When faced with this unfortunate situation, you’re often presented with two primary options: repainting the hood or opting for a complete replacement. But which route is the most sensible for your specific situation? Understanding the nuances of each approach can help you make an informed decision.

Assessing the Damage: Determining the Extent of the Problem

The first step in deciding whether to repaint or replace your car’s hood is to carefully assess the damage. Minor scratches that only affect the clear coat or paint surface can often be easily addressed with a simple repaint. These superficial blemishes can usually be sanded down and repainted, restoring the hood to its original condition without requiring extensive bodywork. However, if the scratches are deep, penetrating the metal of the hood, or if there’s significant rust or corrosion present, the situation becomes more complicated. Dents or structural damage may also influence the decision, leaning towards replacement as the more practical option. Going for the Auto Repair in Englewood, CO based service would be essential here.

The Advantages of Repainting: A Cost-Effective Solution for Minor Flaws

Repainting is generally the more cost-effective option when the damage is limited to the paint layer. This approach involves preparing the surface by sanding down the scratches and imperfections, applying a primer, and then carefully matching and applying the new paint. A clear coat is then applied to protect the paint and give it a glossy finish. Repainting allows you to preserve the original hood of your vehicle, maintaining its factory specifications. For shallow scratches and minor cosmetic damage, repainting is often the preferred choice for both vehicle owners and professionals.

When Replacement Becomes Necessary: Addressing Extensive Damage

While repainting can fix many minor scratches, more extensive damage might require hood replacement. Deep scratches that have caused rust or corrosion, significant dents, or structural damage to the hood itself often indicate that it’s time to consider replacing the entire part. Trying to repair these types of issues can be labor-intensive, and the repair’s long-term integrity is not always guaranteed. Additionally, if the cost of repairing the existing hood approaches or exceeds the cost of a new or used replacement hood, replacement is often the more practical and cost-effective option.

Professional Expertise: Guiding You Through the Decision-Making Process

Ultimately, the best course of action depends on several factors, including the severity of the damage, the age and value of your vehicle, and your budget. Consulting with a qualified auto body repair professional is always recommended. They can assess the damage, provide an accurate estimate for both repainting and replacement, and guide you in making the most informed decision for your particular situation. Their expertise can help you weigh the pros and cons of each option, ensuring you choose the solution that restores your car’s appearance and protects its value in the long run.

A car door lock actuator is a small but essential component within the vehicle’s door assembly. It’s responsible for locking and unlocking the door electronically when you press the button on your key fob or door panel. Over time, actuators can fail due to motor wear, water intrusion, or electrical issues. When an actuator fails, you may notice a door that won’t lock or unlock properly, makes a clicking noise, or responds slowly to commands. Replacing a faulty actuator is crucial for both convenience and security.

Diagnostic Inspection and Confirmation of Failure

Before beginning the replacement process, a professional technician will perform a diagnostic inspection to confirm the actuator is the source of the problem. This involves checking the door’s power lock system, ensuring the issue isn’t related to fuses, wiring, or the central locking module. Once the actuator is identified as the failed component, the technician will determine whether it can be repaired or if a full replacement is needed. Proper diagnosis prevents unnecessary part replacements and ensures the root cause is addressed. A support from the Auto Repair in Grand Rapids, OH based service would be essential here.

Removal of the Door Panel and Accessing the Actuator

The first hands-on step of the replacement process is removing the interior door panel. This is done carefully to avoid damaging plastic clips, trim pieces, or wiring. Once the panel is removed, the technician disconnects the electrical connectors and carefully removes any moisture barriers or insulation that may obstruct access. The actuator is typically mounted within the door behind the latch mechanism, which may require removing additional hardware such as rods or locking cables. Expert care is taken to preserve other internal components during this process.

Installing the New Actuator and Reassembly

After removing the faulty actuator, the new unit is installed and connected to the locking mechanism and wiring harness. Professionals use OEM (Original Equipment Manufacturer) or high-quality aftermarket parts to ensure long-lasting performance. Once the new actuator is in place, all linkages and connections are tested to confirm smooth operation. The moisture barrier is reinstalled, followed by reattaching the door panel and trim components. A final functional test is performed using both the key fob and interior lock switch to confirm the repair was successful.

Why Professional Installation Matters

Although some car owners may consider actuator replacement a DIY task, the job involves intricate door mechanisms and sensitive electronics. Professional installation ensures the actuator is installed correctly without damaging other components, misaligning linkages, or causing electrical issues. Experts also guarantee that any warning lights, security features, or remote functions work as intended. Additionally, a certified repair often includes a warranty, offering peace of mind. Timely, accurate replacement of a faulty door lock actuator restores your vehicle’s safety, convenience, and full functionality.

In conclusion, professional door lock actuator replacement is a precise process that ensures your car’s locking system operates reliably and securely. Trusting skilled technicians for this repair saves time, protects your vehicle’s interior, and ensures long-term performance.


The BMW XM G09 is a performance-focused luxury SUV that combines aggressive styling with cutting-edge technology and a powerful hybrid drivetrain. For enthusiasts looking to push their XM to the next level, upgrading the exhaust system is one of the most effective modifications available. In particular, installing a bmw xm g09 downpipe can significantly enhance performance, sound, and overall driving dynamics. But what exactly does a downpipe do, and why should you consider this upgrade?

What Is a Downpipe and Why Does It Matter?

A downpipe is a crucial part of your vehicle’s exhaust system, connecting the turbocharger to the rest of the exhaust pipes. In factory setups, downpipes are often equipped with restrictive catalytic converters that can limit exhaust flow. Aftermarket downpipes, like the ones available for the BMW XM G09, are designed to reduce backpressure, improve airflow, and unleash the full potential of the turbocharged engine.

Key Performance Benefits of a BMW XM G09 Downpipe

Increased Horsepower and Torque

One of the most compelling reasons to upgrade to a bmw xm g09 downpipe is the noticeable gain in power. By reducing exhaust restrictions, the engine breathes more freely, allowing the turbo to spool faster and produce more boost. Depending on other supporting modifications and tuning, drivers can see significant increases in both horsepower and torque.

Improved Throttle Response

A less restricted exhaust path means faster evacuation of exhaust gases. This leads to quicker engine response, reduced turbo lag, and a more immediate feeling when pressing the accelerator. If you value dynamic performance and sharp driving feedback, a downpipe upgrade is a must.

Enhanced Exhaust Sound

While the BMW XM G09 already has a deep and sporty tone, installing an aftermarket downpipe brings the sound to life. Expect a louder, more aggressive exhaust note with distinctive turbo spool and pops during gear shifts or deceleration. The bmw xm g09 downpipe transforms the SUV from refined to ferocious.

Better Turbo Efficiency and Lower EGTs

Reducing exhaust backpressure helps the turbo operate more efficiently. This not only improves performance but also leads to lower Exhaust Gas Temperatures (EGTs), which can prolong the life of your turbocharger and other engine components. It’s a practical upgrade for long-term reliability under spirited driving.

Unlocks Tuning Potential

If you’re planning on tuning your BMW XM G09, an upgraded downpipe is a critical supporting mod. Tunes are more effective when paired with improved hardware. A performance bmw xm g09 downpipe ensures your vehicle makes the most of ECU calibrations, yielding optimal gains and engine responsiveness.

Catted vs. Catless Downpipes – Which One Is Right?

When selecting a bmw xm g09 downpipe, you’ll need to choose between a catted and catless version. Catless downpipes offer maximum performance benefits but may not meet emissions regulations in all regions. Catted downpipes include high-flow catalytic converters that provide a balance between power gains and emissions compliance. The choice depends on your local laws and whether the vehicle is for street or track use.

High-Quality Options from AXI Performance

If you’re looking for a reliable and well-crafted downpipe solution, the BMW XM G09 downpipe from AXI Performance is a top-tier choice. Made from high-grade stainless steel, it offers durability, precise fitment, and optimal flow characteristics for the best possible gains.

Installation and Considerations

While the installation of a bmw xm g09 downpipe can be completed by a skilled enthusiast, it’s often best left to professional shops to ensure correct fitment and avoid CEL (check engine light) issues. Pairing the downpipe with an ECU tune will help eliminate error codes and maximize performance benefits.

Final Thoughts

Whether you’re chasing better power, sound, or throttle response, upgrading to a bmw xm g09 downpipe is one of the most rewarding performance modifications you can make. It not only elevates your driving experience but also lays the foundation for future tuning upgrades. With the right product and installation, your BMW XM G09 will truly live up to its M pedigree.